Introduction
AppRunner, released May of 2021, is the easiest way so far to run a full web application on AWS. The container landscape in AWS include several different managed service offerings which align to specific use cases. The use case this article will focus on is the web application and how to go from code to a functional application within minutes using AppRunner.
What is AppRunner
AppRunner is a fully managed container application service that lets you build, deploy, and run containerized web applications and API services without any infrastructure management. You can think of AppRunner as ElasticBeanStalk for containers. Its purpose is to greatly simplify and streamline the delivery of your application and reduce reliance on infrastructure expertise for managing load balancers, certificates, and monitoring and logging configuration.
You have probably heard of the AWS Shared Responsibility Model, which outlines what components of the IT stack AWS is responsible for, versus what the customers (you) are responsible for. All AWS Services fall somewhere along this shared responsibility spectrum reducing the management burden that comes with traditional IT operations. With EC2, you are responsible for OS patching and updates, and AWS is responsible for physical hardware infrastructure. With RDS you are responsible for your data and schema, and AWS manages database updates, and underlying infrastructure. AppRunner continues this pattern shifting responsibility further toward AWS so the customer is only responsible for their code and service configuration, freeing them up to focus more on development tasks. Easing this burden is sometimes referred to as reducing the undifferentiated heavy lifting, allowing you to focus more on business outcomes.
What makes AppRunner special is that it abstracts away most technical knowledge required to provision resources required to run your containerized workload so that you only have to worry about providing the container image or application code.
For an in-depth technical explanation of how AppRunner works under the hood, and how AWS leverages other services internally, I encourage you to watch this AWS keynote, here.
I mentioned earlier that workload use cases determine where an application should run, and it should be noted that AppRunner is not suited for all container use cases. AppRunner does not orchestrate multiple Containerized Workloads like you would find in Kubernetes, support finite tasks/jobs in the way that ECS would, or scale to zero like Lambda would. What it does excel at is streamlining the process from code generation to a running web application in a few simple steps. If you are wondering about all of the containerized workload service offerings in AWS and their use cases, in a future blog we will step through the decision making process of determining which service is best suited for your containerized workload.
Deploying code to AppRunner
In AppRunner, the unit of deployment is the “Service”, which can be thought of as your container image or application code.
To deploy a “Service” you start by clicking “Create an AppRunner Service”

Create AppRunner Service
Here you will have a choice of selecting a source for your application. A “source” refers to where you would like to pull your application source code from — either a Container Registry such as ECR, or a Source Code Repository — which in our example is Github.
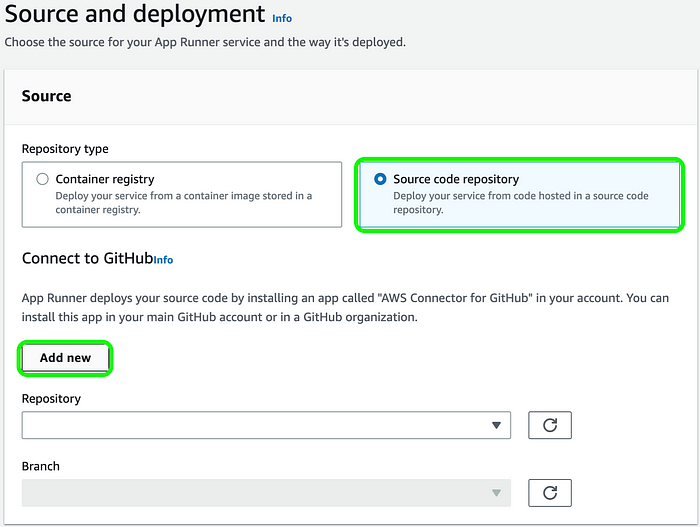
Add code repository to use with AppRunner
Selecting Source Code Repository then clicking “Add New” prompts you to install the AWS Connector for Github in your Github Account which allows AWS to retrieve the application source and deploy it to AppRunner.
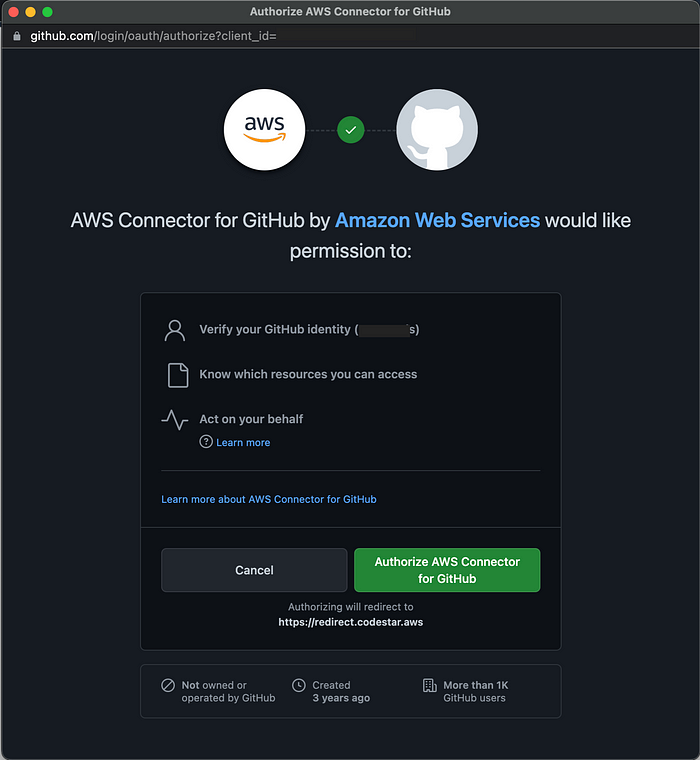
Authorize AWS to connect to code repo
Clicking “Authorize AWS Connector for Github” will then take you to an AWS page where you can create a name for your AWS Connector. The assumption for this guide is that this is your first time installing a connector, and in that case, click “install another” will redirect you back to Github to select the account/organization to install the connector to.
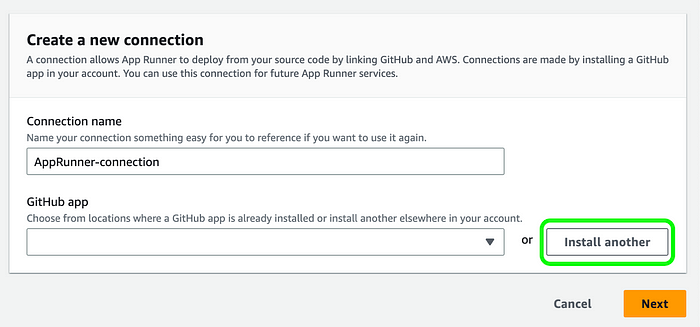
Name connector and install to repo

Confirm installation
NOTE: This may require additional authentication steps, for example if you have Two Factor Authentication enabled…
Once the connector has been installed, the pop-up window will close and return back to the AppRunner source and deployment page. Here you will see your AWS Connector Application name, source repository, and branch from which you can deploy your application.
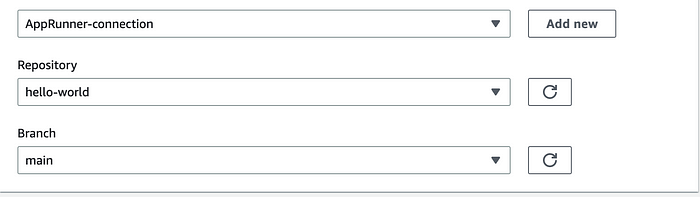
Connector and repository info
In the deployment settings, for the purposes of this example, we will use the default “Manual” deployment trigger.
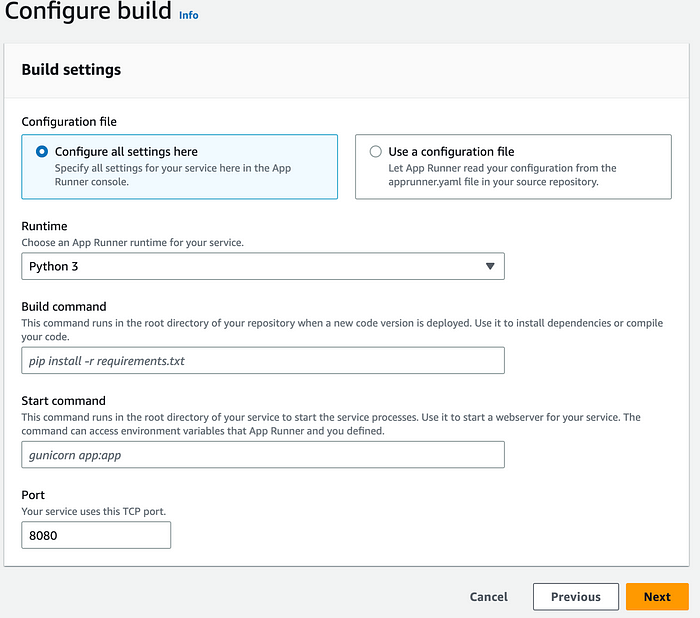
In the configure build page, select the settings that correspond to your application requirements. In this example Python is the runtime used. The defaults for build command and start command are acceptable. Your requirements may vary depending on your runtime.
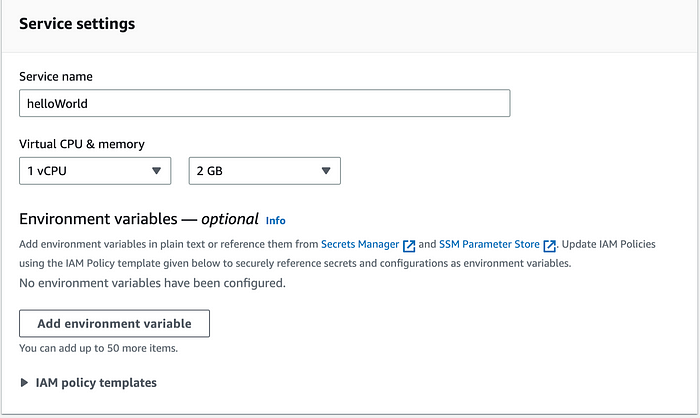
Service settings
In the Service configuration page specify the resource requirements of your application as well as provide any environment variables needed by the application.
Also within this page you can configure several service features such as AutoScaling, health checks, networking (whether to have a public or private endpoint), WAF, and Security/IAM to connect to other AWS Services for example.
Service requirements
Clicking next will then take you to the summary page where you can review all of your AppRunner Service settings and configurations.
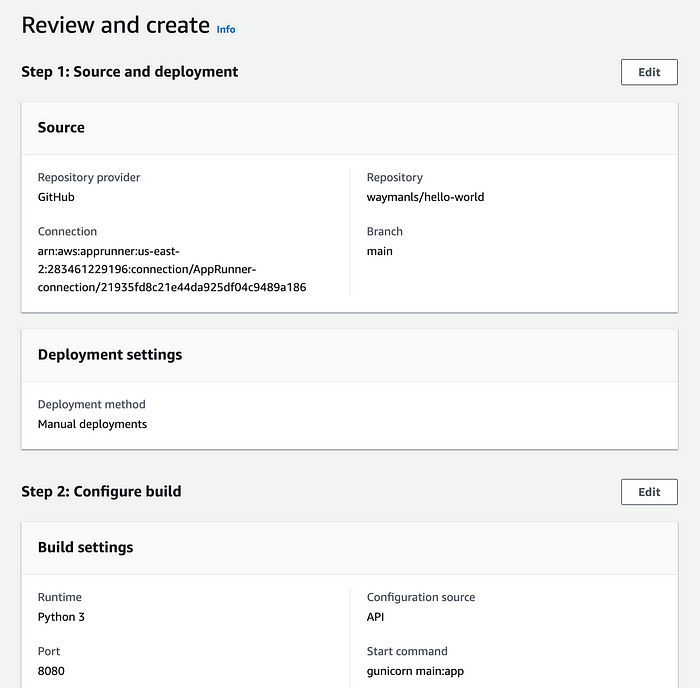
Confirm service settings
If all values look appropriate for your application, deploy your service by clicking Create and deploy.
You will then arrive at the AppRunner Service Dashboard. In this dashboard you are able to view the status of your service, deployment logs, and other valuable information. After a few minutes, you should see a status of successfully deployed along with a default domain HTTPS URL that can be used to access your service.
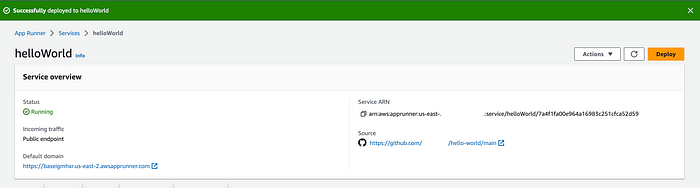
Service successfully deployed
 Application URL
At this point your web application has been successfully deployed to AppRunner in record time with just a few clicks.
Conclusion
AppRunner makes the process of deploying your application (both code and containers) very streamlined. Very little knowledge of containerization, load balancing, certificate generation, autoscaling and other technical subjects are needed to get your application up and running. If you are looking to deploy a web application directly from code or from an existing container quickly and securely, I would encourage you to consider AppRunner as a viable option.
Finally, if following along for demo purposes, please ensure to delete all resources created during this post and unlink any applications for cost and security measures.