Photo by Wanan Wanan from Shutterstock
**Introduction**
Microsoft’s Azure AI Foundry simplifies AI development by providing a unified platform for building, deploying, and managing intelligent applications. It serves as your AI development hub, combining language models, data management, and deployment tools in a single environment. It abstracts the complexity of AI development while maintaining the flexibility developers need for sophisticated solutions.
We’ll start with a basic chat interaction to understand the foundational conversation capabilities of a large language model. Then we’ll explore Azure AI Foundry Agent Service, where specialized agents can be created to handle specific tasks, maintain conversation context, and integrate with external data sources.
I’ll show how to quickly create a basic agent that relies solely on its training data, and then an enhanced version incorporating additional knowledge sources for more accurate responses. Finally, we’ll demonstrate a practical Python code example showing how to integrate these agents directly into your applications for scalable, intelligent solutions.

Azure AI Foundry Ecosystem
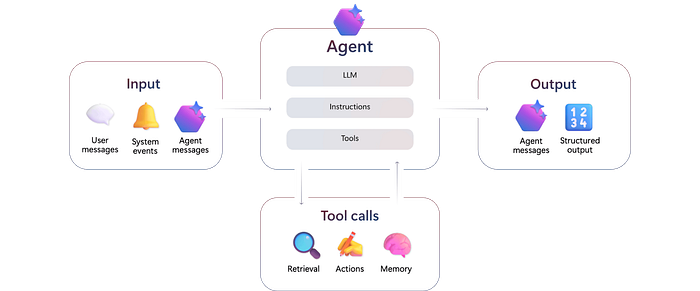
AI Agent Components
**Azure Portal**
For this example, we will perform a standard setup of Azure AI Foundry and an Agent Service using the Azure Portal. The prerequisites to get started merely involve a few permissions after you access your Azure subscription.
- Get access to an Azure subscription, and you can start for free.
- Ensure you have the Azure AI Account Owner and Azure AI Project Manager roles at the subscription scope.
- If configuring an Azure AI Foundry standard setup, ensure you have permissions to assign roles to any required resources (Cosmos DB, Azure AI Search, Azure Blob Storage). For more information on RBAC roles, specific to the Azure AI Foundry Agent Service, see Azure AI Foundry Agent Service RBAC roles. The built-in role needed is Role Based Access Administrator, which provides the key permission
Microsoft.Authorization/roleAssignments/write - If you encounter errors about missing registrations or unregistered providers, then you must register the provider mentioned in the error message.
Deploy the Project and basic AI Agent
Use this custom deployment template to provision the necessary Azure AI Foundry project and agent.
https://portal.azure.com/#create/Microsoft.Template/uri/https%3A%2F%2Fraw.githubusercontent.com%2Fazure-ai-foundry%2Ffoundry-samples%2Frefs%2Fheads%2Fmain%2Fsamples%2Fmicrosoft%2Finfrastructure-setup%2F40-basic-agent-setup%2Fbasic-setup.json
This launches in the Azure portal and creates an Azure AI Foundry project where you can work in an independent environment to quickly explore your AI ideas, build prototypes, and more.
Select the subscription and resource group, fill in the other fields, including location, and leave all the model-related fields untouched. This provides the details for creating the project and deploying a GTP-4o model.
Click the ‘Review + create’ button to deploy the template. It will take a few minutes to complete.
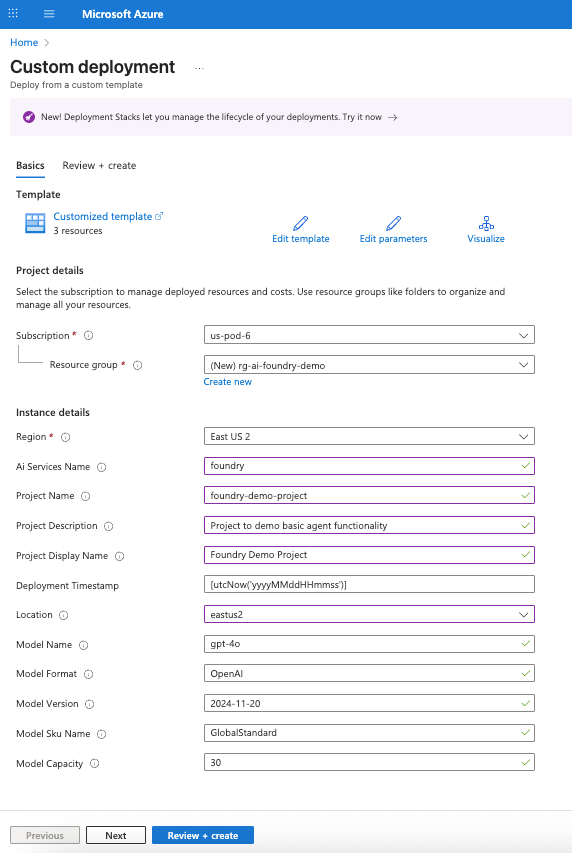
Deployment template form to create Azure AI Foundry resources
Click ‘go to resource group’ when the deployment is done to view the resources.
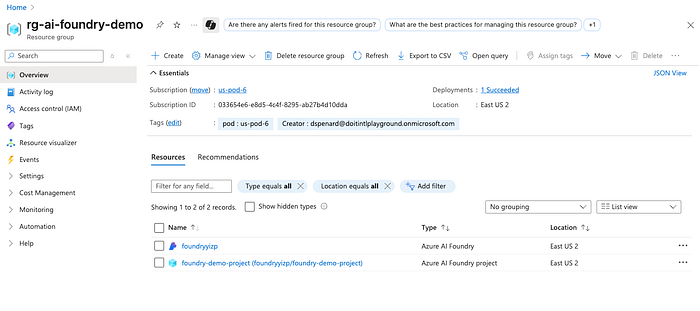
Resource Group showing deployed Project
If you click on the project link, you can go to the Azure AI Foundry portal.
Link to go to the project
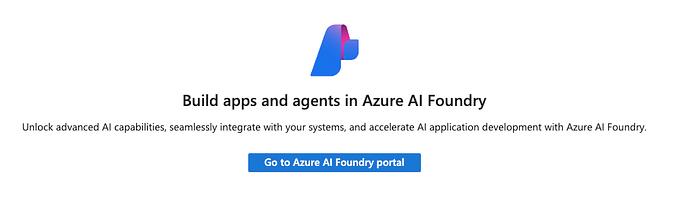
Azure AI Foundry Portal
Chat with the model
Once you access the Azure AI Foundry portal, if it doesn’t take you directly to the Playground for your project, select the project name from the main page and then select Playgrounds. This will select the gpt-4o deployment for you, where you can begin chatting with the model. Try a few prompts and see what you get. And maybe try out different model instructions, or restrict answers to a certain topic, or add a data source to supplement the model with your data.
For example, I instructed the model to only provide answers about earthquakes, and then I asked for a recipe.
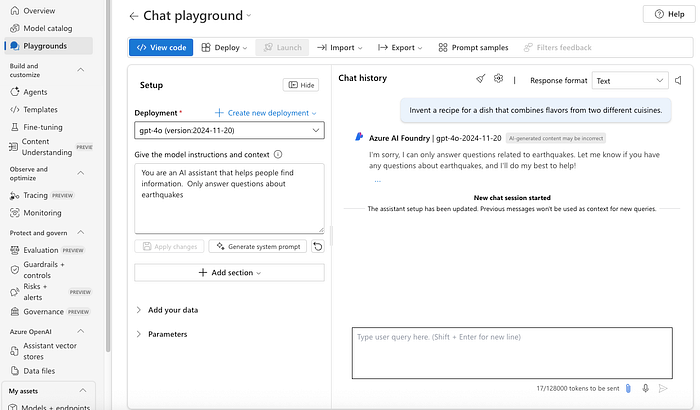
Chat playground with sample model instructions
Deploy chatbot as a web app
One cool feature is deploying a simple chatbot as a web app. It will take quite a few minutes to deploy, and then you can click the link to open the web app and try it out. Note that there is much to be desired here to make something like this production-ready, but this demonstrates how easy it is to create a basic chat web app.
Next to the ‘View code’ button at the top of the Chat playground interface, select ‘Deploy as web app’.
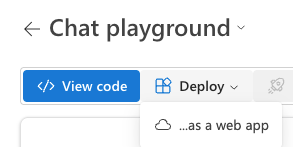
Deploy chatbot as a web app
To launch the web app after it deploys, go to ‘My assets/Web apps’ and click the link for the deployed web app.
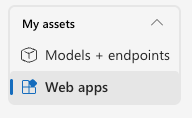
Launch web app
If you notice in the Chat playground, when I provided instructions to the model, I restricted its answers to only questions about earthquakes. As you can see in the chat interface in the web app, the model failed to tell me a joke, but it did answer an earthquake question. However, the model was only trained on data up to October 2023, so in the next section, I’ll show you how to supplement the model with a custom data source without any need to retrain it.
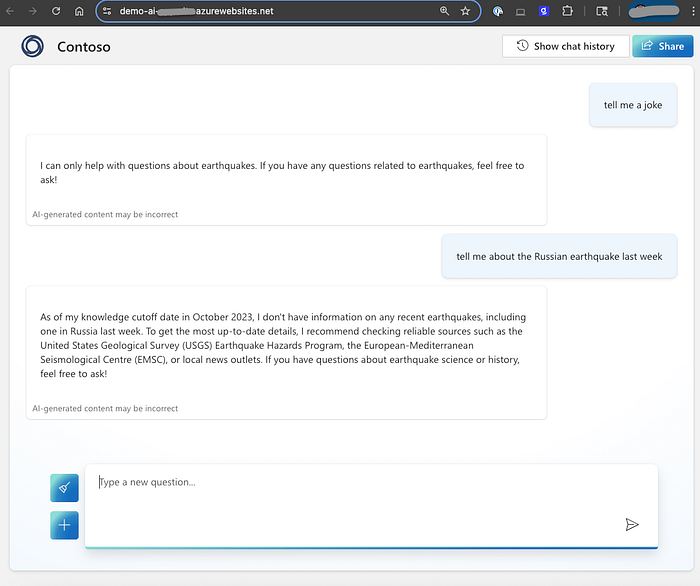
Chatbot web app example
Use an agent to chat with the model
Creating a simple agent
Now that you have a good understanding of how chatting with a model works, let’s enhance this with an agent that wraps this functionality. Then, we’ll supplement the model’s knowledge with a custom data source and then call this agent via a simple Python example.
Select ‘Agents/New Agent’ to create a new agent. Provide an agent name and set of instructions. The instructions are required, and they should be specific to what an agent should do, and in this case, it will be an agent that can only answer questions about earthquakes. You can leave the Deployment as the default gpt-4o, and the Temperature and Top P defaults are fine as they are. Agent configuration changes are auto-saved.
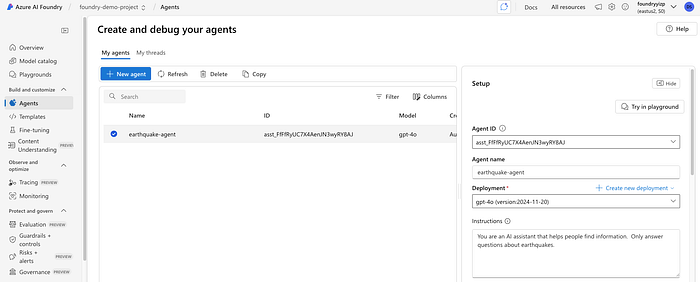
Agent configuration for chatting about earthquakes
If you click the ‘Try in playground’ button, you can test out the agent the same way you chatted directly with the model previously.
Supplementing the agent with additional knowledge
Azure AI Foundry offers multiple options for integrating custom data into your AI applications and services. It is beyond the scope of this article, but more information is available here.
As a simple example, I’ll be adding one PDF file as a data source to provide my agent with more knowledge about earthquakes. I downloaded a PDF copy of the Wikipedia page on the 2025 Kamchatka Peninsula earthquake, which you can download here if you want to follow along and use it in your agent.
Once you have the PDF file, click the ‘+Add button’ for Knowledge in the Agent configuration, then select ‘Files’ to upload the file. You can leave the defaults as-is to create a new vector store, then select ‘Upload and save’.
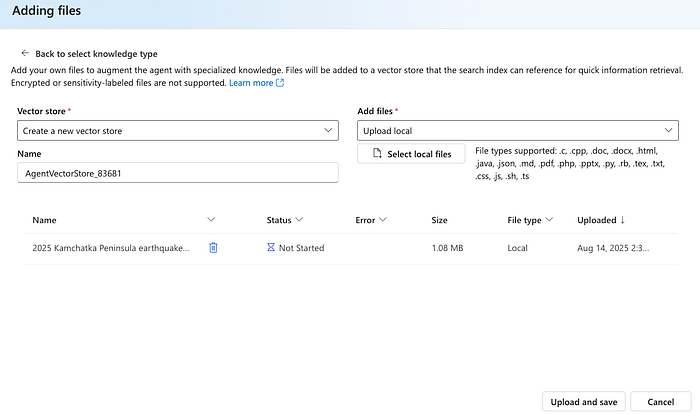
Uploaded PDF file to supplement the agent with additional earthquake knowledge
If you click the ‘Try in playground’ button again, this time you can ask about the July 2025 earthquake.
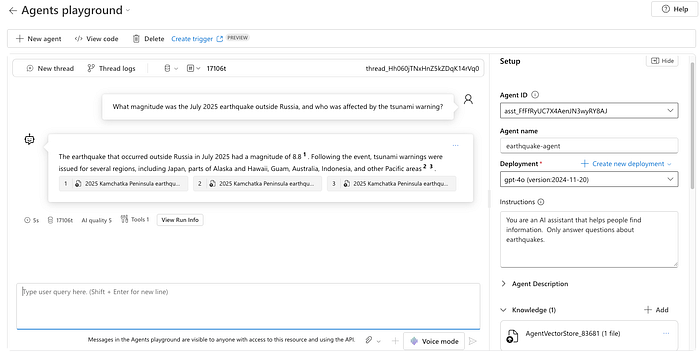
Chat with agent after a data source was added
Python example to call the agent
Now that you have a good understanding of how a basic Agent works in Azure AI Foundry, let’s try out some Python code to hit the model endpoint directly. But first, get a copy of the Azure AI Foundry project endpoint from the Overview page, and the Agent ID from the Agent page.
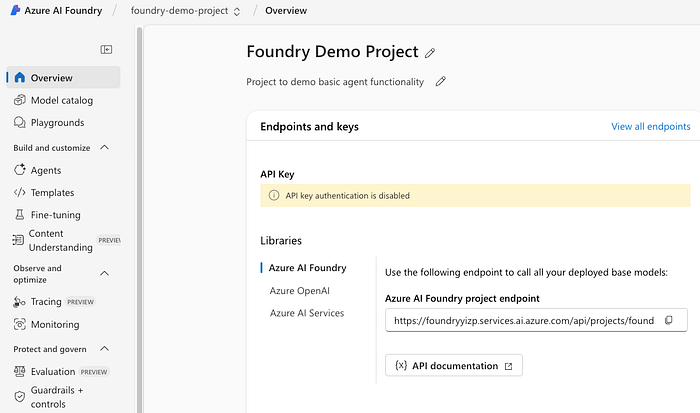
Overview page showing Azure AI Foundry project endpoint
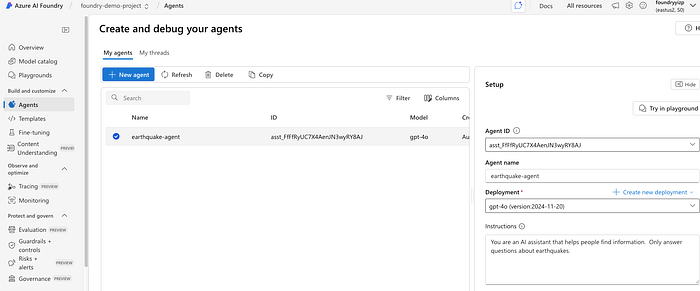
Agent page showing the Agent ID
Copy this source code locally to a file named agent_earthquake_chat.py. It’s a simple, silly Python example that is not production-friendly by any means :)
from azure.ai.projects import AIProjectClient
from azure.identity import DefaultAzureCredential
from azure.ai.agents.models import ListSortOrder

import os

endpoint = os.getenv("AZURE_FOUNDRY_ENDPOINT")
agent_id = os.getenv("AZURE_FOUNDRY_AGENT_ID")

if not endpoint or not agent_id:
    raise EnvironmentError("AZURE_FOUNDRY_ENDPOINT and AZURE_FOUNDRY_AGENT_ID must be set in your environment.")

project = AIProjectClient(
    credential=DefaultAzureCredential(),
    endpoint=endpoint)

agent = project.agents.get_agent(agent_id)

thread = project.agents.threads.create()
print(f"Created agent thread, ID: {thread.id}")
print("Type 'quit' to exit the chat.")

# Initial message
message = project.agents.messages.create(
    thread_id=thread.id,
    role="user",
    content="Hi Agent"
)

run = project.agents.runs.create_and_process(
    thread_id=thread.id,
    agent_id=agent.id)

if run.status == "failed":
    print(f"Run failed: {run.last_error}")
else:
    messages = project.agents.messages.list(thread_id=thread.id, order=ListSortOrder.ASCENDING)
    for message in messages:
        if message.text_messages:
            print(f"{message.role}: {message.text_messages[-1].text.value}")

# Chat loop
while True:
    user_input = input("You: ").strip()
    if user_input.lower() == "quit":
        print("Conversation ended. See you next time.")
        break

    # Add user message
    project.agents.messages.create(
        thread_id=thread.id,
        role="user",
        content=user_input
    )

    # Run agent again
    run = project.agents.runs.create_and_process(
        thread_id=thread.id,
        agent_id=agent.id)

    if run.status == "failed":
        print(f"Run failed: {run.last_error}")
        continue

    # Display latest response
    messages = list(project.agents.messages.list(thread_id=thread.id, order=ListSortOrder.ASCENDING))
    for message in reversed(messages):
        if message.role == "assistant" and message.text_messages:
            print(f"Agent: {message.text_messages[-1].text.value}\n")
            break
Here are step-by-step instructions and commands to run your script in an isolated Python environment, ensuring no reliance on global packages.
- While in the same folder as the source code downloaded, create a virtual Python environment:
python3 -m venv foundry-env
2. Activate the environment:
source foundry-env/bin/activate
3. Upgrade pip (recommended):
pip install --upgrade pip
4. Install required Azure dependencies:
pip install azure-ai-projects azure-identity
5. Set environment variables for Azure AI Foundry Agent with your specific values:
export AZURE_FOUNDRY_ENDPOINT="https://foundryyizp.services.ai.azure.com/api/projects/foundry-demo-project"
export AZURE_FOUNDRY_AGENT_ID="asst_ABCfRyUC7X4AenJN3wyRY7AJ"
6. Run your script:
python agent_earthquake_chat.py
Example chat via Python
(foundry-env) david@Mac azure-ai-foundry % python agent_earthquake_chat.py
Created agent thread, ID: thread_Y9FxpLWwVELeY3wlNoE1K6ez
Type 'quit' to exit the chat.
MessageRole.USER: Hi Agent
MessageRole.AGENT: Hello! How can I assist you with earthquake-related information today?
You: What is Azure AI Foundry?
Agent: I'm here to assist with earthquake-related information only. Let me know if you have any questions about earthquakes!

You: What was the tsunami impact of the July 2025 earthquake not far from Russia?
Agent: The July 2025 earthquake off the coast of Kamchatka, Russia, had widespread tsunami impacts. Tsunami waves reached heights of up to 15 meters in some Russian regions, causing local panic and destruction, particularly in Severo-Kurilsk, Komandorsky Islands, and nearby areas. Coastal regions as far as Hawaii, Alaska, and Japan observed increased wave activity, with localized alerts issued in the Pacific Rim. Evacuations were prompted in Japan and parts of the United States due to concerns of waves exceeding several meters in height【8:0†source】【8:1†source】【8:19†source】.

You: Give me 10 bullet points explaining what happens when an earthquake occurs.
Agent: Here are 10 key points explaining what happens during an earthquake:

1. **Rupture at Fault Line**: Earthquakes begin when stress in Earth's crust surpasses the strength of the rocks, causing a sudden rupture along fault lines.

2. **Release of Energy**: This rupture releases a burst of energy in the form of seismic waves, propagating through the Earth.

3. **Seismic Waves Propagate**:
   - *Primary Waves (P-Waves)*: Travel fastest and move through solids, liquids, and gases.
   - *Secondary Waves (S-Waves)*: Slower than P-waves and cannot travel through liquids.

4. **Ground Shaking**: These seismic waves cause the ground to shake, with the intensity depending on the earthquake's magnitude and depth.

5. **Surface Displacement**: In some cases, visible breaks or shifts appear at the Earth's surface along the fault line.

6. **Aftershocks**: Smaller earthquakes occur as the crust adjusts to the changes caused by the mainquake.

7. **Tsunamis** (if under ocean): Submarine earthquakes displace water, potentially generating tsunamis that radiate outward.

8. **Landslides and Liquefaction**: Ground disturbances can lead to landslides or liquefaction of soils, which compromise stability in affected areas.

9. **Damage and Destruction**: Seismic activity damages buildings, infrastructure, and natural landscapes, depending on proximity and construction standards.

10. **Human Response and Resilience**: People respond with evacuations, rescue operations, and rebuilding efforts, adapting to the earthquake's aftermath.

Let me know if you'd like details on any specific aspect!

You: quit
Conversation ended. See you next time!
Clean up Azure Resources
The cost of the resources created in this exercise is very minimal, but you can expect to spend $1 or $2. After creating the project and experimenting with a few dozen prompts via the chat playground and Python example, my costs were under $3.
To clean up all the Azure resources used during the exercise, Azure makes it very simple for you. Back in the Azure Portal, navigate to Resource groups and select the resource group you created for this exercise, then select ‘Delete resource group’ to delete it.
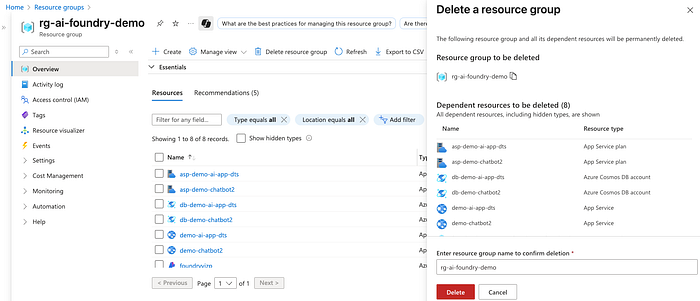
Delete resource group in the Azure Portal
We progressed from a basic chat interaction to building a specialized agent with external knowledge integration, concluding with a practical Python example for real-world implementation. Azure AI Foundry effectively bridges the gap between AI complexity and developer accessibility, providing the tools needed to build sophisticated, scalable, intelligent applications without getting overwhelmed by technical intricacies. There’s much more to discover with Azure AI Foundry beyond what I’ve covered here, and I hope this small sample of its capabilities provides the guidance and motivation you need to build amazing AI-enabled applications with Azure.
Whether it’s Generative AI and machine learning, cost optimization and infrastructure automation, or security hardening and cloud architecture design, DoiT International offers extensive expertise across multiple cloud domains. To explore how DoiT can help you implement AI and modernize other aspects of your cloud infrastructure, don’t hesitate to reach out to learn about our cloud engineering solutions.