
A quick tutorial on how to configure your PyCharm to run on a remote GCP instance using an ssh remote interpreter
What are we trying to achieve?
When developing a Python application, it’s often convenient to run the code on a GCP instance (AI Notebook / Google Compute Engine). This is beneficial especially since running Machine Learning (ML) or data processing code often requires a high spec machine with multiple CPUs and RAM.
Another benefit is that running the code remotely makes it authenticate against other Google Cloud Platform services as the service account associated with the instance. Upon completing this tutorial, you will be able to run PyCharm from your Mac, with the code executed remotely on a GCP VM.
Prerequisites
In order to get started, you will need the following:
- PyCharm Pro installed on your Mac/Linux machine
- An active GCP account
Let’s Do It
Step 1: Set up a ssh key on your Mac [1]
Execute the following command to generate a new ssh key pair on your Mac/Linux terminal:
ssh-keygen -t rsa -f ~/.ssh/[KEY_FILENAME]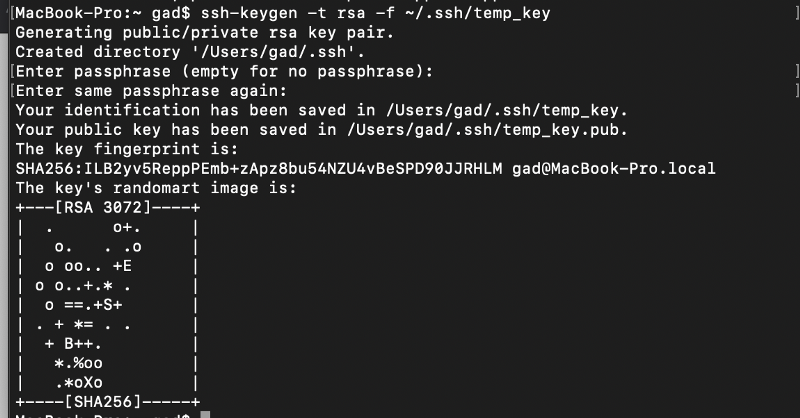
I chose not to set up a passphrase for the key and named it temp_key
Format the Public Key
Print the content of the public key value of your ssh key pair that you created under by using the following command:
cat ./ssh/temp_key.pub
Copy the content of the key to the clipboard starting from the ssh-rsa (including) phrase until the “=” sign (before the username).

Open any notepad and format the key starting in the following way:
ssh-rsa [KEY VALUE]= [USER_NAME]
Keep this text for later.
Step 2: Create or Edit a VM on GCP
Now you need a machine on the cloud. I like using AI Notebooks because these machines come preinstalled with an AI Python environment that includes many data science, ML and Google cloud libraries. To create a notebook follow this guide.
Note that AI Notebooks (now part of Vertex AI) are creating an underlying Compute Engine instance. After creating either a bare Compute Engine Instance or an AI Notebook edit you will need to edit them to allow remote access via SSH. This will allow PyCharm to copy files to your machines and connect to the Python interpreter.
Editing the Machine of an AI Notebook
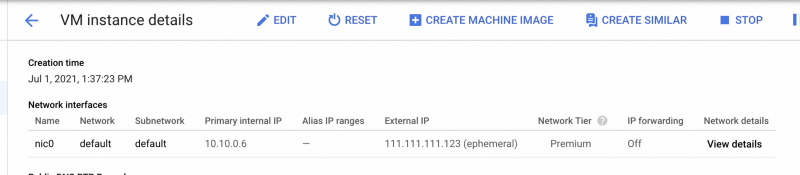
The notebook instance called “my-instance” has the following details:
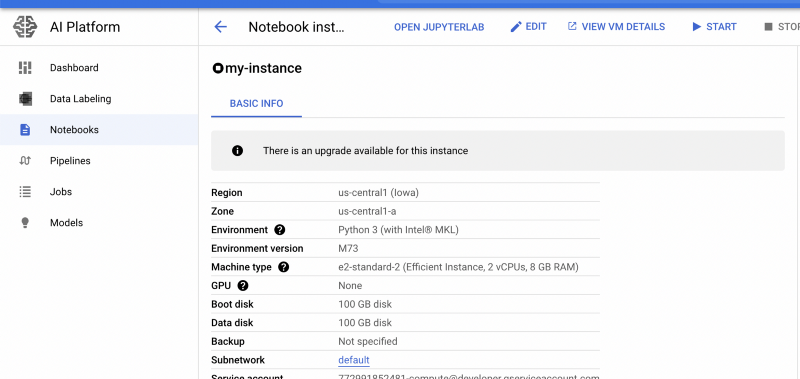
By clicking “VIEW VM DERAILS” and then “EDIT” you can change the spec of the compute engine that hosts the AI Notebook. Scroll down to SSH Keys and then open the dropdown list: “show and edit”
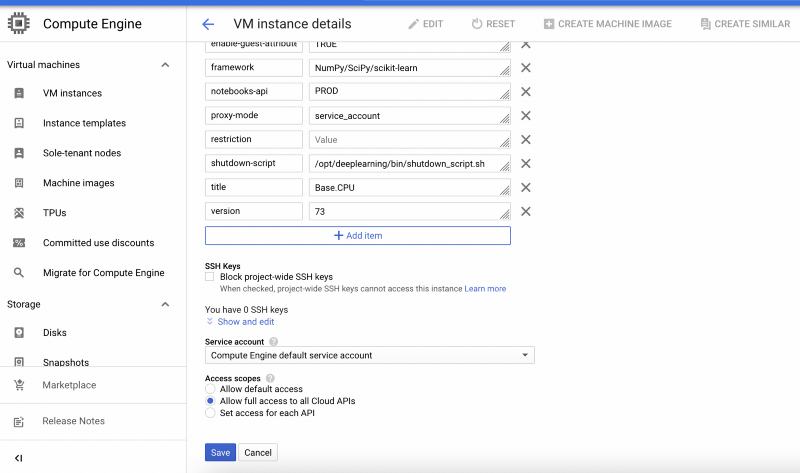
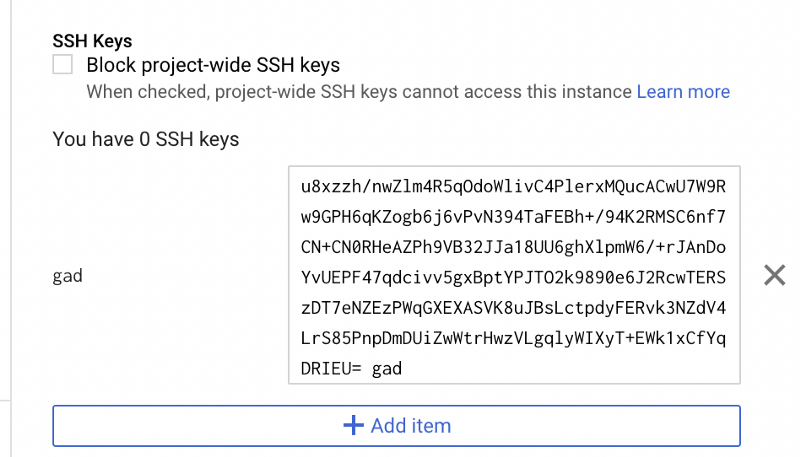
Click “Add item” and paste the formatted ssh key adding a user name in the end. If you were successful, your username will appear to the left of the key.
You can also set up a static external IP for the machine, to make sure that it doesn’t change its public IP every time that you restart it.
Step 3: Set up PyCharm!
Now, your machine can accept SSH connections using the key-pair that you created. All that’s left to do is to allow PyCharm deploy and run the code on that remote machine. Copy the external IP of the machine. It can be viewed on the VM’s details once the VM is running.
Then open PyCharm > Preferences > Project:[name] > Python interpreter > Options wheel > add
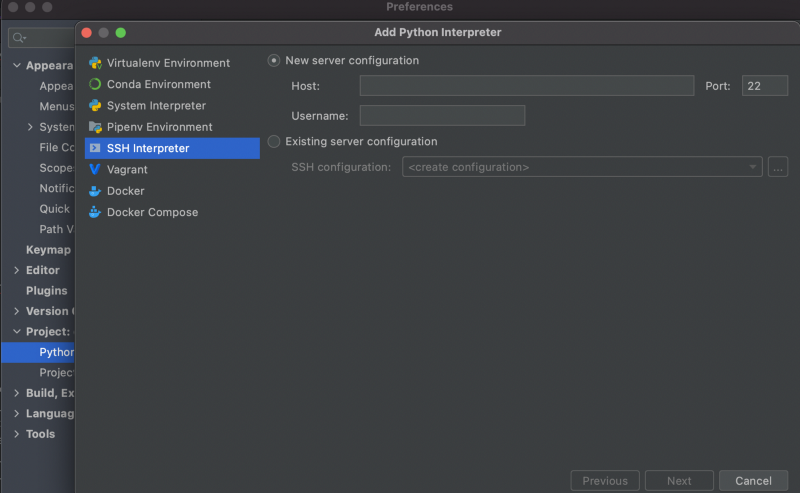
Under Host, put the external IP address of the machine, and under the Username, write the name of the user that you used when created the key. Click “Next” to tell PyCharm to try to establish a connection to the VM. You will then need to provide the correct connection credentials.

Direct the “private key file” to the location of the ssh private key (/[user]/.ssh/temp_key in our case, the one without the .pub extension)
Click next, and you’re good to go! You will see that the interpreter is now your remote Python environment at the bottom right of the screen. It may take it a few minutes for the first type to copy the PyCharm helper files to the remote machine and sync the Python environments.

Advanced: Multiple Python Environments
Sometimes, there is more than one Python environment installed on the remote machine. For example, you may have a conda environment installed on your AI Notebook. You can choose which one you want to work with by editing the configuration of your remote interpreter.
Access the interpreter settings from the bottom right menu of PyCharm:
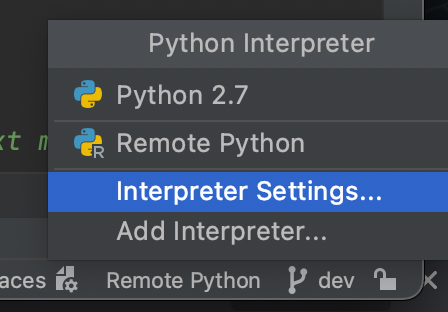
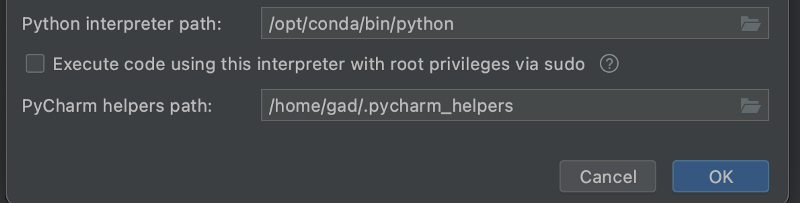
Again, edit your existing interpreter settings:
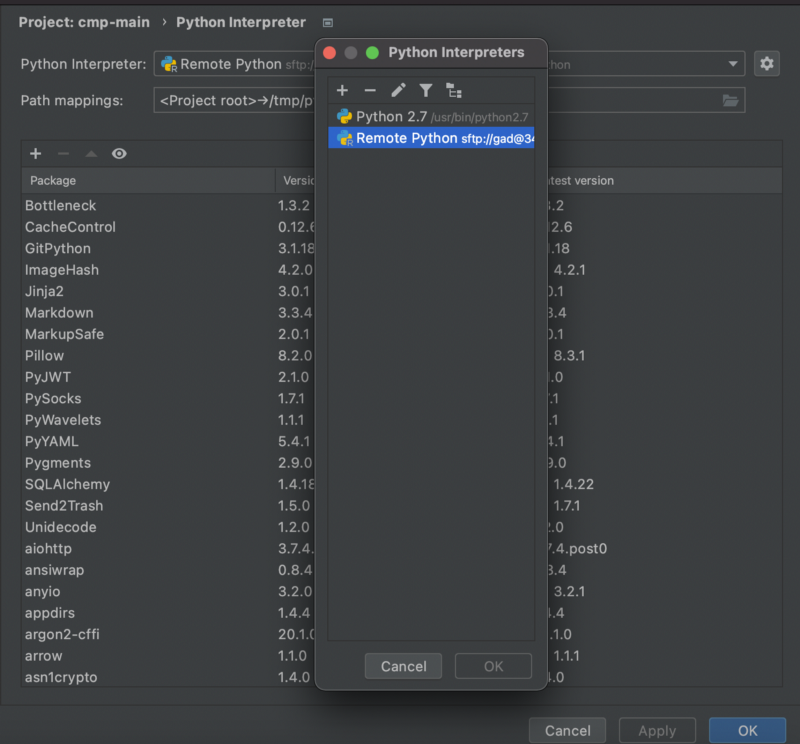
Under “python interpreter path”, paste the location of your Python installation on the remote machine.
Summary
Besides the aforementioned tutorial, there are a couple of resources I wish to share with you. You can further learn about advanced set up of Python interpreter in PyCharm via this guide by JetBrains. Interested in advanced configuration of your SSH key on GCP instances? Access this resource.
Stay productive!
Thanks for reading! To stay connected, follow us on the DoiT Engineering Blog, DoiT Linkedin Channel, and DoiT Twitter Channel. To explore career opportunities, visit https://careers.doit.com.