In this article, I will explain why you should resize images in your websites, and how you can leverage Google Cloud Functions with GCP Load Balancer and Cloud CDN to deliver on-the-fly resized images to improve your website performance, save expensive storage space and improve your website loading time.

Image generated with ChatGPT 5
Almost every major website resizes the photos displayed on the site, and that’s for three primary reasons:
- Downloading large images leads to high bandwidth usage and high data transfer costs.
- Scaling down images via HTML requires the client browser to download the entire image and then spend CPU time resizing it, leading to slower loading time of your website.
- Without resizing on-the-fly, you need to store different sizes of the same image for your website's Desktop, Mobile, Tablet and email (newsletter), as storage costs in the cloud start at $0.02/GB per month, which could be expensive.
Read more about image optimization in Steve Souders' book, Even Faster Web Sites , Chapter 10.
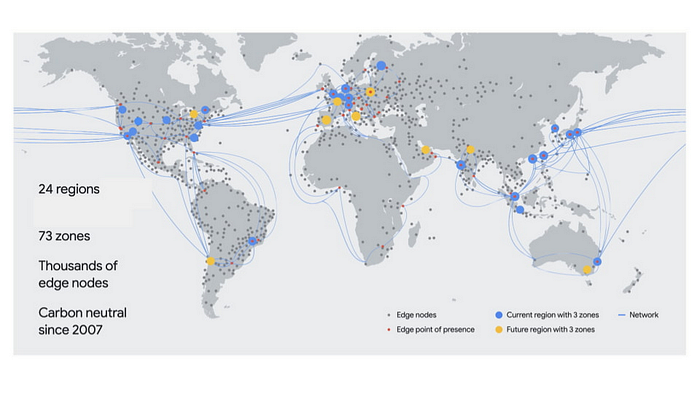
Using Google Cloud Content Delivery Network (CDN) allows us to provide faster loading times to our static content, as the objects are cached at the edge network, which is spread globally.
The solution in this article uses the following services:
- Google Cloud Storage — to store the images in full size.
- Cloud Function — to resize the objects on the fly.
- Google Cloud Load Balancer with Cloud CDN enabled — the users will access the load balancer to retrieve the images.
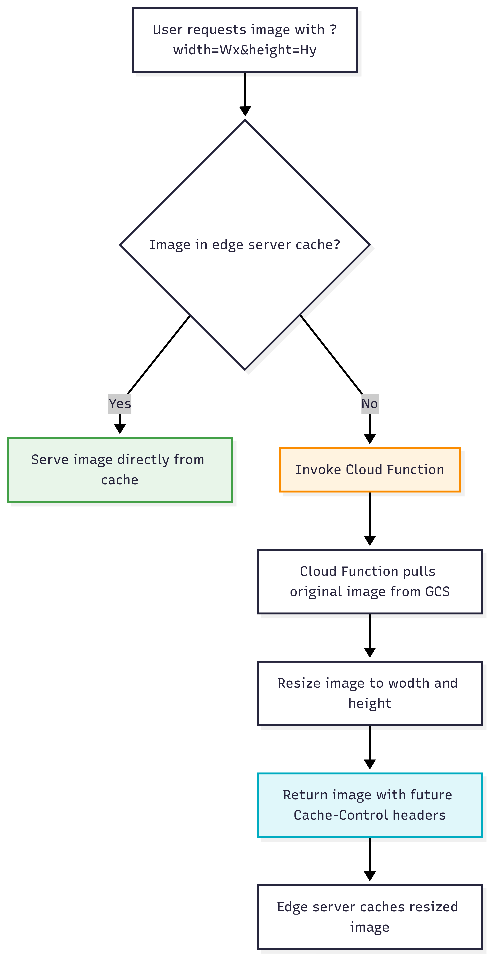
We create a GCP Cloud Load Balancer (LB) and configure it to invoke a Cloud Function, the function pulls an image from Google Cloud Storage (GCS), resize it, and the LB reply with the resized image and save the image at the edge for future requests.
How to deploy
We create a Google Cloud Storage (GCS) Bucket and upload all the objects (images) in their original size.
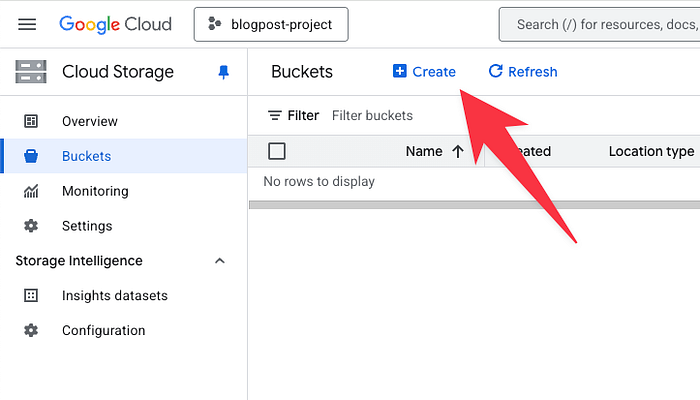
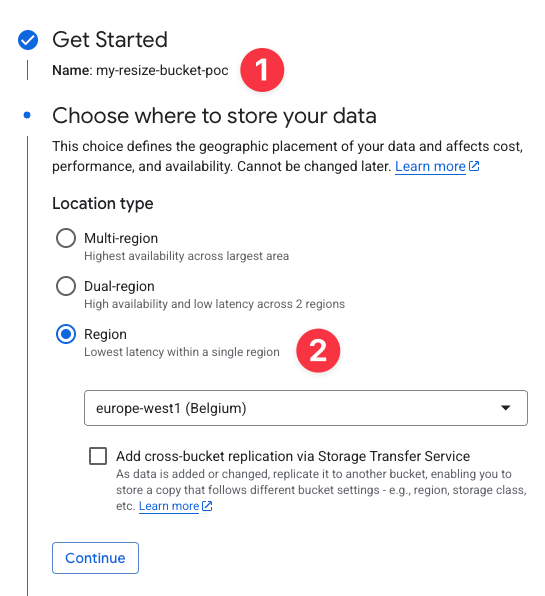
We set a name for the bucket and configure a regional location, and click on the Create button:
We uploaded an image, for example, nasdaq.jpg (of the Nasdaq building in Times Square, which I took in 2019) to this bucket in its original size, 6.3 MB.

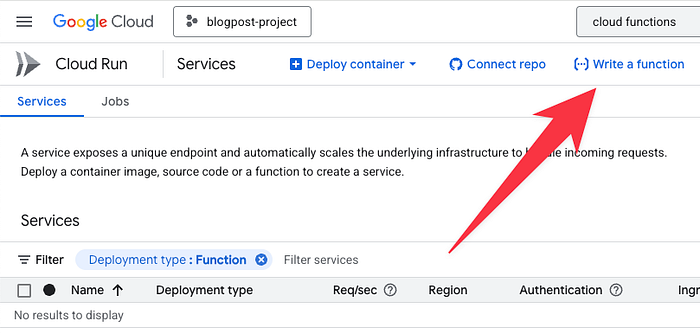
The next step is to create a function. Go to the Cloud Functions console and click on Write a function.
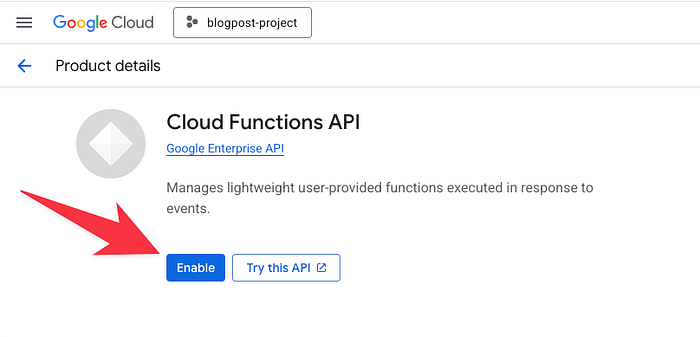
If this is the first time you use Cloud Functions, you might see a message “Cloud Functions API is enabled”. This means that Cloud Functions features are being enabled in your project at no extra cost.
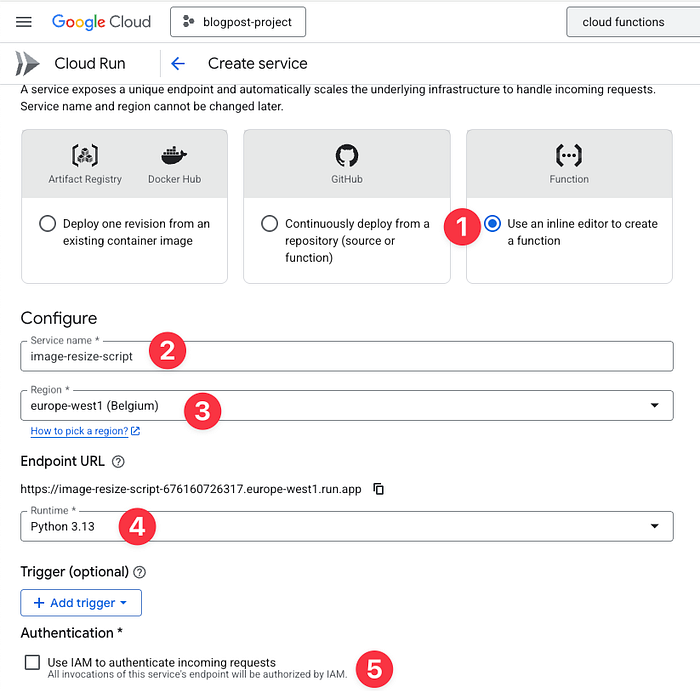
In this step, we need to configure the function:
- We use the inline editor.
- Set a name for the function.
- Choose the region — that should be the same as the GCS region.
- Set the runtime. In this demo, we work with Python.
- And uncheck the IAM authentication so the LB can invoke the function.
Now click on the Create button, and if it’s the first time you use GCP services, you might need to enable a few more APIs:

in this example we need to enable Cloud Build to build the container that run the function,
Now it’s the fun part, We need to write the code that actually pulls the file from GCS, resizes it and returns the resized file.
We wanted to see if this could be done entirely by ChatGPT, so I had a few iterations with the LLM, after writing the following prompts:
“Write Python code to resize jpg png images to x,y based on the string provided.”
“Let’s assume it’s google cloud function that pass the params as query string and the file needs to be loaded from gcs and the result should be sent to a load balancer with the appropriate mime type.”
“What should I put in requirements.txt for this code?”
“Now I'm getting ‘Error processing image: module ‘PIL.Image’ has no attribute ‘ANTIALIAS’’”
The result is the following code. In line 9, set the bucket that we use:
This is the requirements.txt file to configure Cloud Functions, which Python libraries it should use to build the container:
When we update the code in main.py and the libraries in requirements.txt, we see a warning that “The specified function (entry point) might not be present in your source code. Please ensure the entry point in your code matches the input field.”
This is because the function is calling the resize_image function, and Cloud Functions default function name is hello_http:

We change the Function entry point to resize_image and click Save and redeploy.
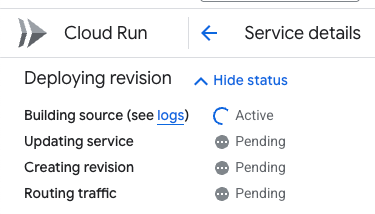
Cloud Functions builds the container of our code. It might take a couple of minutes, and we can track the status of the build at the top of the dashboard:
Note: Cloud Function invokes a function. The function uses Compute Engine Default Service Account, which grants the function access to all the GCS Buckets in the project. We will not cover this in the article, but as a best practice, you should use a dedicated service account with the least privileged access.
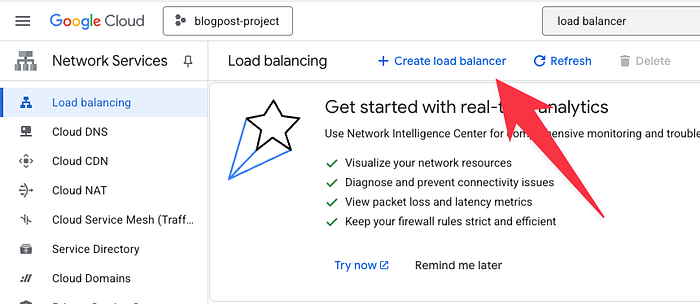
The next step is to create a Load Balancer. Search for “Load Balancer” in the search console, access the Load Balancer dashboard and click on Create load balancer:
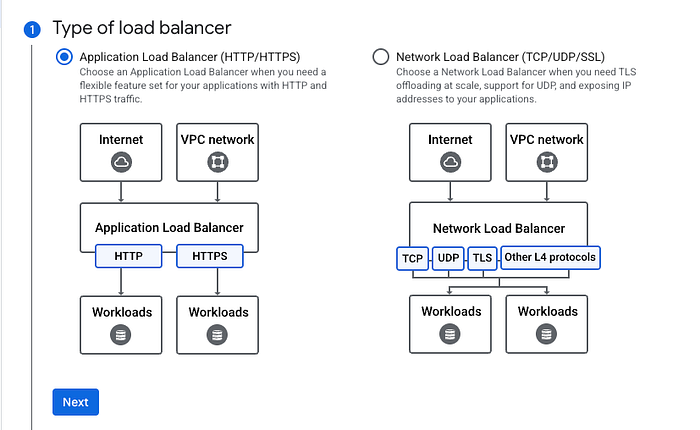
We want to create a Global, Public Facing, Application Load Balancer, Under the type of the load balancer, choose Application Load Balancer (HTTP/HTTPS):
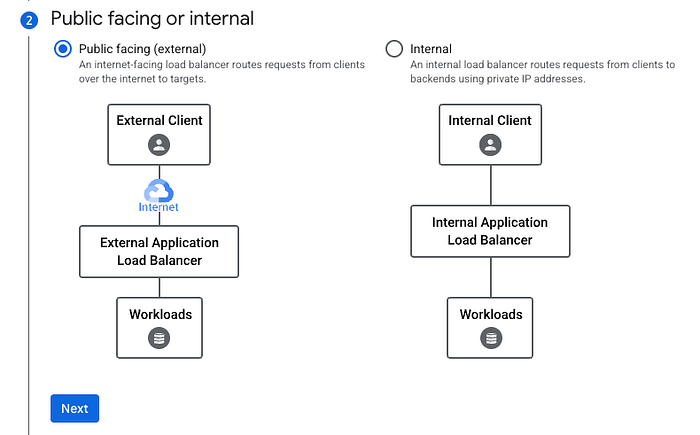
We want our users from around the world to be able to access the load balancer, so we choose Public Facing (external):
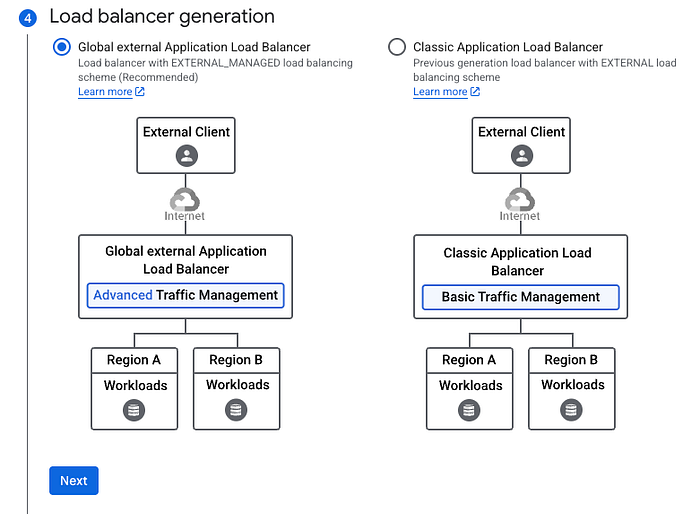
We chose the Global load balancer to leverage the Google Cloud CDN feature, which allows us to cache the resized image at the edge server (at no extra cost).

Then we choose the latest Load Balancer generation and click the Next and Create button.
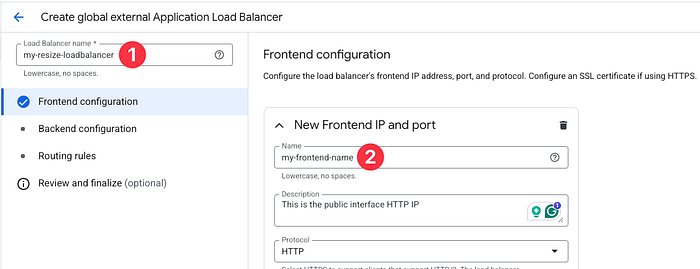
To simplify this stage, we create an HTTP frontend endpoint for the Load Balancer.
Set a name for the Load Balancer and the frontend IP.
Click on Backend Configuration, and in the Backend services & backend buckets box, click on Create a backend service.
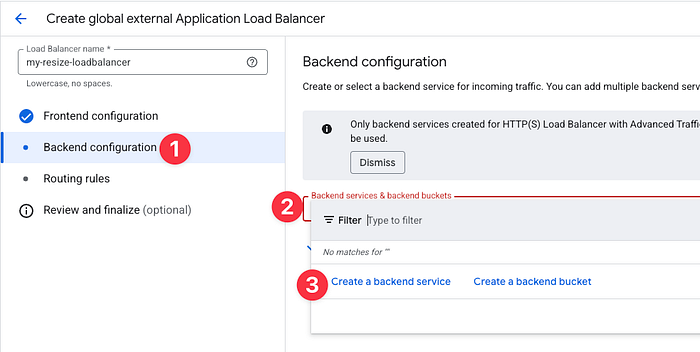
The backend service tells the Load Balancer to which resource pass the request, in our configuration, it’s a Cloud Function.
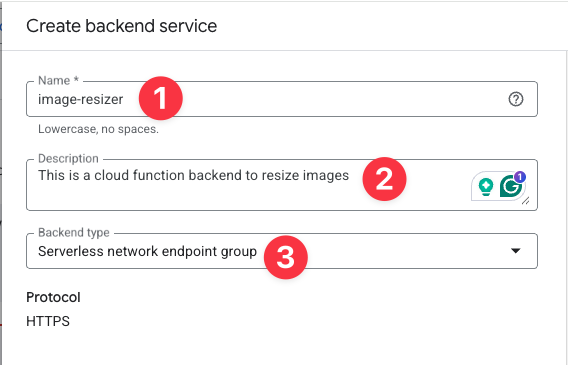
Set a name and a description for the backend service, and change the Backend type to Serverless network endpoint group.
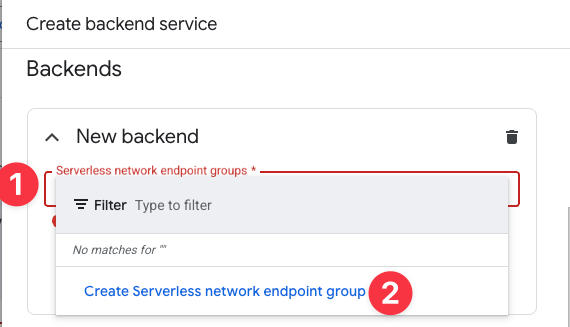
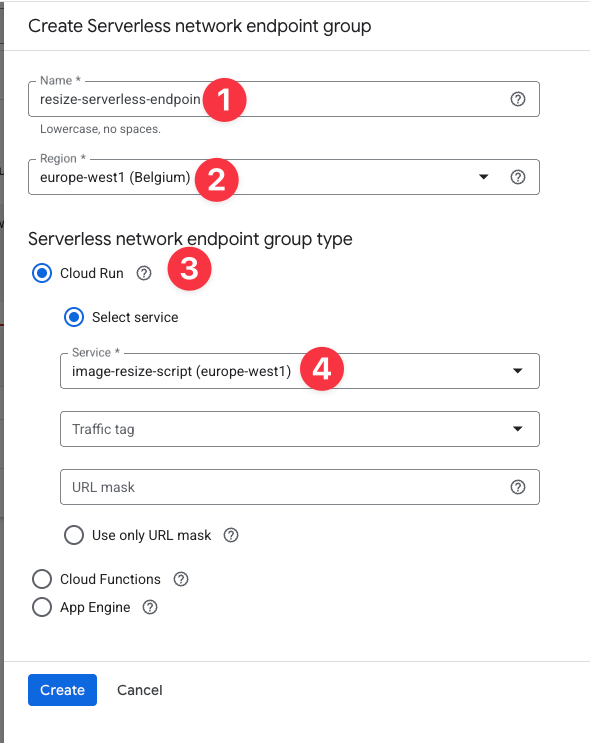
Scroll down to the Backends area. Under New backend, click on the Serverless network endpoint groups and click on Create Serverless network endpoint group.
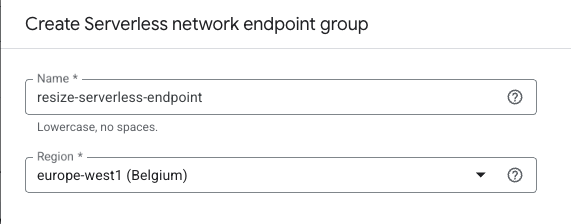
Set the Name for the Endpoint and choose the region where you create the Cloud Function.
If you have never invoked the function before, this error pop up:

Go to the link in the error and enable Cloud Function API:
Go back to the Serverless network endpoint page, set a name for the endpoint, the Region where the function is located, and choose Cloud Run (It might be confusing, but Cloud Functions are now called Cloud Run Functions, and use the same underlying technology).
Select the function and click on Create.
In the backend page, we can configure Cloud CDN cache settings:
We can configure the CDN to cache the response for the duration (1 hour from row 54 in the script), or a longer duration.
I want to highlight that CDN uses a warm cache, meaning that only frequently requested content is stored in the CDN cache. If you set a 1-year cache for your content, but there are no frequent requests to the content, you can expect that after some time the CDN will pull the content from the origin (the function).

See the Logging feature (marked with the arrow above). It is great for debugging and tracking usage, but also costly ($512 for 1 TB of logs).
If you generate a lot of requests, you can set the Sample rate to 0.01 to log one request out of every 100 requests.
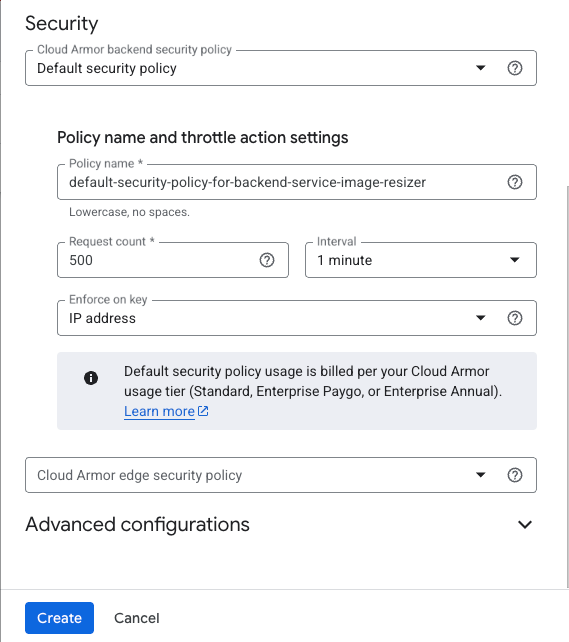
Let’s scroll down to Security:
By default, Google enables Cloud Armor, the Web Application Firewall (WAF), for our backend, but since there is additional cost and this is a demo, we disable it by clicking on the Cloud Armor backend security policy and changing it to None.
The next step is to click on Create, and in the Load Balancer dashboard, click on Create again.
Note: Creating and updating a Load Balancer in GCP can take up to 15 minutes to propagate.
Now, once the load balancer is ready, click on the name of the load balancer and you see the IP that was generated:
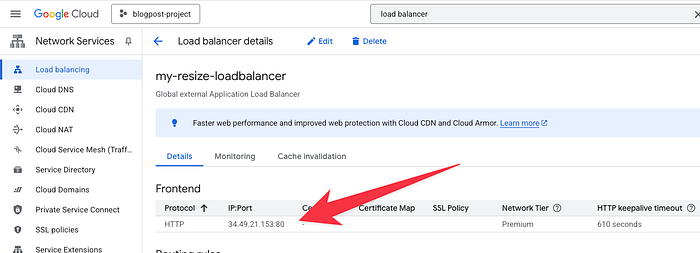
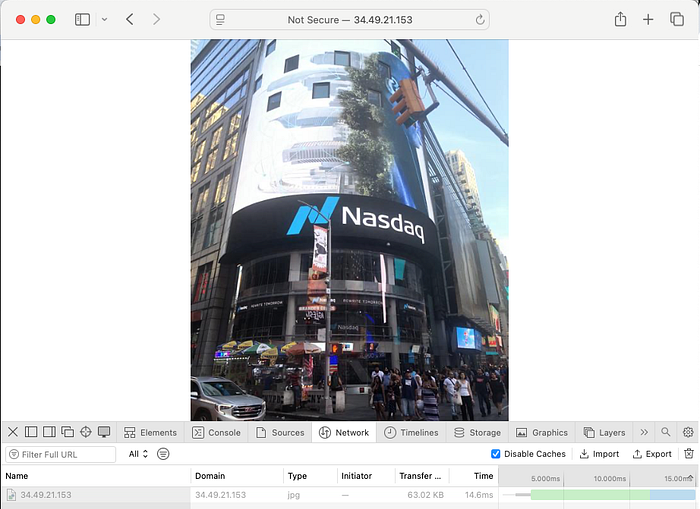
We access this IP and specify the name of the image and the height and width:
http://34.49.21.153/?image=nasdaq.jpg&size=500x600
The result: Instead of a 6.5 MB file, we received a smaller, resized image, weighing 63 KB.
My job is to guide customers in using the cloud. Come see what we can do for you at doit.com/services